
Introduction
As the chill of winter recedes and new blooms burst forth, spring awakens the senses with its vibrant colors and fragrant aromas. The world outside transforms into a canvas of pastel hues, where blossoms dance in the gentle breeze, and the sun’s warm rays beckon us to step outside. This season of renewal and growth also brings with it an incredible opportunity to create and personalize your living spaces. Taking on DIY projects not only fills your home with cheerful spring decor but also provides a fulfilling way to spend your weekend.
Creating something with your own hands can be a delightful escape from the everyday routine. Whether you’re an experienced crafter or a novice eager to explore your creativity, there’s a wealth of spring-inspired DIY projects waiting for you. In this article, we’ll delve into a variety of fun projects—from stunning flower arrangements to vibrant painted pots—each designed to bring the essence of spring right into your home. Get ready to roll up your sleeves and embrace the joy of crafting!
“Creating a cozy reading nook is all about maximizing comfort in a small space. It’s about intentional design that serves both function and feeling.”
– Interior Design Magazine
The Benefits of Spring-Inspired DIY Projects
Engaging in DIY projects during spring offers more than just a creative outlet; it can significantly enhance your mental well-being. Crafting has been shown to reduce stress, boost mood, and improve overall mental health. As you immerse yourself in the colors and materials of spring, you may find that your worries fade away, replaced by a sense of accomplishment and joy. Studies suggest that even simple activities, like painting or arranging flowers, can trigger the release of dopamine, the feel-good hormone, promoting a sense of happiness and satisfaction.
Working with seasonal materials also connects you to nature, providing an opportunity to appreciate the beauty around you. The vibrant colors of fresh flowers, the scent of new growth, and the textures of natural elements can inspire your creativity and encourage self-expression. Perhaps you’ll find a unique way to incorporate your personality into your projects, making your home decor truly one-of-a-kind.
Moreover, DIY projects can serve as thoughtful, personalized gifts for friends and family. By crafting something special, you show your loved ones that you care, and handmade gifts often carry more emotional weight than store-bought items. So, gather your materials, unleash your imagination, and let the spirit of spring guide you as you create something beautiful.
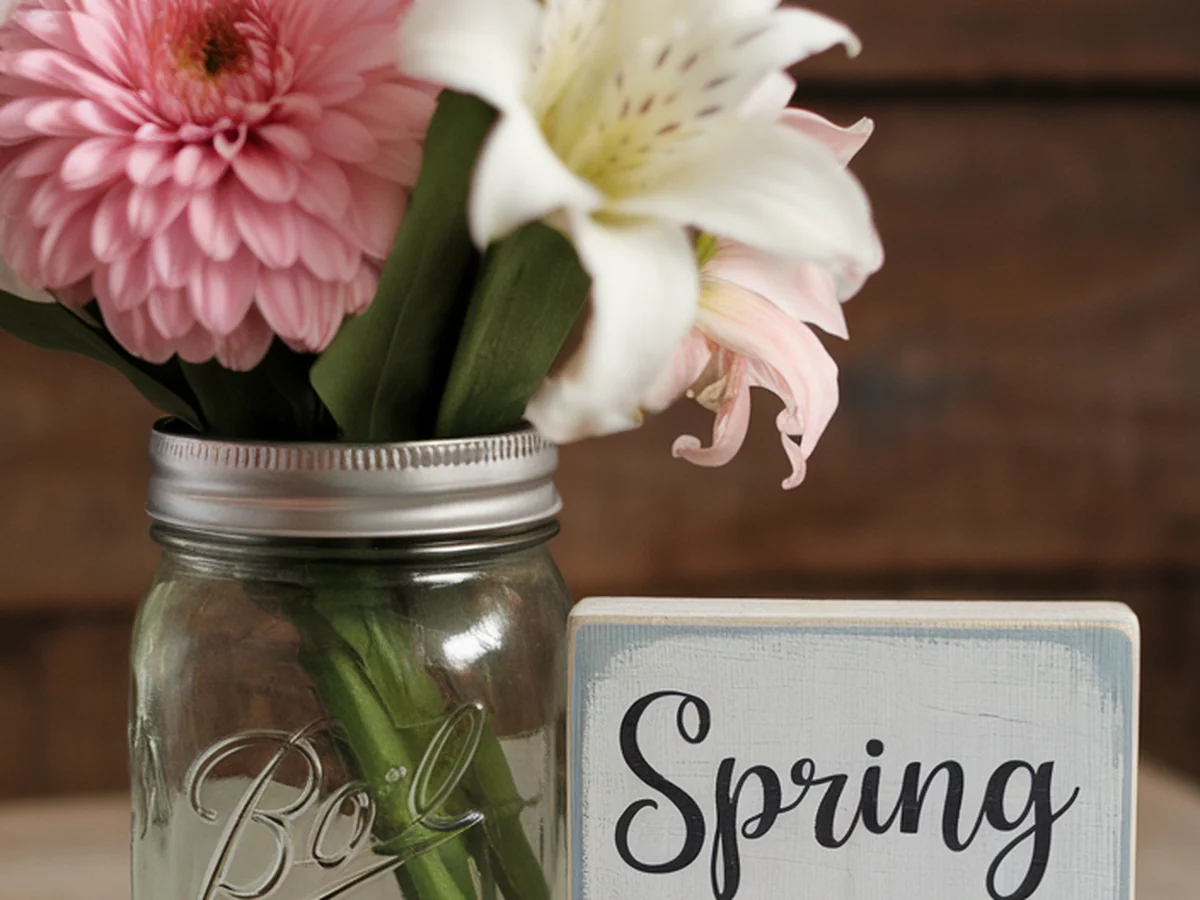
DIY Flower Arrangements
One of the most delightful ways to celebrate spring is by creating stunning flower arrangements that bring the beauty of the outdoors inside. To get started, you’ll need a few basic materials:
- A variety of fresh flowers (such as tulips, daffodils, or peonies)
- Greenery (like eucalyptus or ferns)
- A vase or container of your choice
- Floral tape or foam (optional)
- Scissors or floral shears
Here’s a simple step-by-step guide to crafting a beautiful arrangement:
1. Prepare Your Flowers: Trim the stems of your flowers at an angle, about one inch from the bottom, using sharp scissors or floral shears. This allows for better water absorption.
2. Choose Your Vase: Select a vase that complements your flowers. A clear glass vase highlights the beauty of the blooms, while a ceramic or colored vase can add a stylish touch.
3. Layer Your Greens: Start by adding greenery to the base of your vase. This creates a lush foundation for your flowers and helps to hold them in place.
4. Add the Flowers: Begin placing your larger flowers in the arrangement first, then fill in with smaller blooms. Aim for a balanced look by spreading colors and shapes evenly throughout.
5. Finishing Touches: Add more greenery or filler flowers to fill in any gaps, creating a full, vibrant arrangement.
To ensure your flowers last longer, remember to change the water every few days and trim the stems as needed. If you want to experiment with color themes, consider using seasonal flowers, such as pastel shades for a soft spring look or bright, bold hues for a vibrant display.
Spring-Themed Wreaths
Wreaths are a charming way to welcome spring into your home. They can be made from various materials, including fresh flowers, twigs, or even fabric. Here are a few types of wreaths you might consider:
- Floral Wreaths: Made with fresh or faux flowers for a vibrant look.
- Twig Wreaths: Incorporate natural elements for a rustic feel.
- Fabric Wreaths: Use colorful fabrics to create a unique, textured design.
For a classic floral wreath, gather these materials:
- Floral wire or a wire wreath frame
- Fresh or artificial flowers
- Greenery (optional)
- Floral tape or glue
- Decorative ribbon (for hanging)
Follow these steps to create your wreath:
1. Prepare the Base: If using a wire frame, wrap floral wire around it to create a base for your flowers.
2. Cut Flowers: Trim your flowers and greenery into manageable lengths, around 5-7 inches.
3. Start Adding Elements: Begin by attaching your larger flowers to the frame, securing them with floral wire or tape. Work in a circular pattern and fill in with smaller flowers.
4. Fill Gaps: Use greenery to fill any gaps and add texture to your wreath.
5. Add a Ribbon: Finish your wreath with a decorative ribbon to hang it on your door or wall.
Consider seasonal embellishments such as butterflies, eggs, or colorful ribbons to enhance your design. Your wreath will not only brighten your entryway but also serve as a delightful reminder of the beauty of spring.
Painted Flower Pots
Transforming ordinary terracotta pots into colorful masterpieces is a fun and creative way to welcome spring. Terracotta is an excellent choice for painting due to its porous nature, allowing for better paint adhesion. Here are some paint types and techniques to consider:
| Paint Type | Technique | Suggested Motifs |
|---|---|---|
| Acrylic Paint | Brush or sponge painting | Floral patterns, geometric designs |
| Chalk Paint | Distressing technique | Pastel colors, nature scenes |
| Spray Paint | Ombre effects | Bright colors, abstract designs |
Here’s how to create your painted flower pots:
1. Prepare the Pots: Clean the pots to remove any dirt or dust. If desired, you can use a primer for better paint adherence.
2. Choose Your Colors: Decide on a color scheme that resonates with spring, selecting bright and cheerful hues.
3. Start Painting: Use a brush, sponge, or spray to apply the paint. Don’t be afraid to get creative! You can use stencils for precise designs or simply freehand your creations.
4. Dry and Seal: Allow the pots to dry completely. Once dry, consider applying a sealant to protect your artwork from the elements.
5. Plant Your Flowers: Fill your painted pots with soil and your favorite spring flowers, and enjoy the vibrant display.
For maintenance, ensure your painted pots are placed in an area with appropriate sunlight and water them regularly, taking care not to overwater.
Garden Markers with a Twist
Keeping your garden organized is essential, and personalized garden markers can add a touch of charm while helping you identify your plants. Here’s a list of materials you might use to create unique markers:
- Stones (smooth river rocks work well)
- Wooden stakes or popsicle sticks
- Metal spoons or forks
- Paint or permanent markers
- Sealant (waterproof spray or varnish)
Here’s a creative way to make your garden markers:
1. Choose Your Material: Pick stones, wooden stakes, or metal utensils as your base for the markers.
2. Prepare the Surface: If using wood, sand it lightly for a smooth surface. For stones, ensure they are clean and dry.
3. Design Your Markers: Use paint or permanent markers to label your plants. Get creative with colors or designs that reflect your personality.
4. Seal for Protection: Once dry, apply a waterproof sealant to ensure your markers withstand the elements.
5. Place in the Garden: Insert your markers next to the corresponding plants, adding both functionality and flair to your garden.
Personalizing your garden markers not only helps you keep track of your plants but also adds a whimsical touch to your outdoor space.
Spring-Inspired Candle Holders
Candles can elevate the ambiance of any space, especially during the spring when you want to enjoy the fresh air while relaxing outdoors. Creating decorative candle holders can personalize your space and enhance your mood. Here are some materials you might consider:
- Glass jars (mason jars work well)
- Terracotta pots
- Paint or decoupage materials
- Twine or ribbon for embellishment
Here’s how to craft your own spring-inspired candle holders:
1. Select Your Base: Choose glass jars or terracotta pots as your candle holder base.
2. Decorate: Use paint, twine, or decoupage techniques to decorate your holders. You can paint flowers, patterns, or even write inspiring quotes.
3. Insert Candles: Place tealight candles or small pillar candles inside the holders.
4. Consider Safety: If using glass jars, make sure they are heat-resistant. For terracotta pots, ensure the candles are small enough to avoid heat damage.
5. Enjoy the Ambiance: Light your candles during spring evenings and watch as they cast a warm glow, creating a cozy atmosphere.
To enhance your experience, consider pairing your candle holders with seasonal scents like lavender, lemon, or fresh herbs. These fragrances can invigorate your senses and enhance the joy of spring.
Upcycled Spring Decor
Upcycling is a fantastic way to reduce waste while creating beautiful decor for your home. It encourages creativity and resourcefulness by repurposing common household items. Here are some items you can use and their potential new life:
| Item | New Use | How to Upcycle |
|---|---|---|
| Old Jars | Vases or candle holders | Paint or decorate and fill with flowers or candles |
| Wine Bottles | Planters or decorative accents | Cut and paint for unique planters |
| T-Shirts | Throw pillows or tote bags | Cut and sew into new forms |
Here’s how to get started with an upcycling project:
1. Gather Materials: Collect items that you no longer use but could be transformed into something new.
2. Brainstorm Ideas: Think creatively about how you can repurpose these items. Pinterest is a great resource for inspiration.
3. Get Crafty: Begin your project by cleaning and preparing the items. Use paint, fabric, or other decorative elements to breathe new life into them.
4. Incorporate into Your Decor: Once your pieces are ready, find a place in your home where they can shine. Upcycled decor adds a unique touch that reflects your personality and commitment to sustainability.
By choosing upcycled decor, you not only enhance your living space but also contribute positively to the environment.
Creating a Spring-Inspired Outdoor Space
As spring blossoms, so too should your outdoor spaces. Creating a welcoming and tranquil outdoor area can be a perfect weekend project that allows you to enjoy the beauty of nature. Start by considering DIY furniture projects, such as picnic tables or benches, to enhance your yard. Here are some ideas to get you started:
- Picnic Table: Build a simple wooden picnic table for gatherings and meals outdoors.
- Benches: Construct benches from reclaimed wood or pallets for seating around the garden.
- Planter Boxes: Create raised planter boxes to grow your favorite herbs or flowers.
In addition to furniture, consider decorative elements to complete the space:
- Outdoor cushions for comfort
- String lights to create a magical atmosphere
- Garden decor such as wind chimes or decorative stakes
To maintain your outdoor space throughout the seasons, ensure that your furniture is weather-resistant or is stored during inclement weather. Regularly check your plants and garden decor, replacing any items that may have weathered over time. A well-kept outdoor area will become your favorite retreat as the weather warms up, allowing you to soak in the beauty of spring.
Conclusion
Spring is a season filled with possibilities, and engaging in DIY projects can be a delightful way to celebrate its arrival. From creating beautiful flower arrangements to upcycling decor, each project offers an opportunity to express your creativity and personalize your space. As you choose a project to embark on, remember the joy and satisfaction that comes from crafting something with your own hands.
So roll up your sleeves, gather your materials, and let the spirit of spring inspire your creativity. Whether you share your results on social media or with friends and family, your handmade pieces will surely brighten your home and the hearts of those around you.
Frequently Asked Questions
What are the best flowers to use for spring arrangements?
When creating spring flower arrangements, consider using blooms that are in season and readily available. Popular choices include tulips, daffodils, peonies, and hyacinths. These flowers not only embody the colors of spring but also have varying heights and textures, which can add depth to your arrangements. Incorporating greenery like eucalyptus or ferns can enhance the overall aesthetic and provide a beautiful contrast to the colorful blooms.
How can I make my DIY projects more eco-friendly?
To make your DIY projects more eco-friendly, consider using recycled or upcycled materials whenever possible. For example, old jars can be transformed into vases or candle holders, while wooden pallets can be repurposed into furniture. Additionally, opt for non-toxic paints and adhesives, and remember to minimize waste by planning your projects carefully. Choosing plants for your garden that are native to your area can also support local ecosystems and reduce the need for excessive watering and maintenance.
What are some easy DIY projects for beginners?
If you’re new to DIY projects, start with simple and straightforward ideas that require minimal materials and tools. Some beginner-friendly projects include painted flower pots, fabric wreaths, or basic flower arrangements. You can also try creating garden markers from stones or wooden stakes, which is not only easy but also helps organize your garden. These projects can help you build confidence and encourage you to take on more complex tasks as you become comfortable with crafting.
How do I choose the right paint for my outdoor projects?
When selecting paint for outdoor projects, it’s essential to choose products specifically designed for exterior use. Look for paints labeled as weather-resistant or suitable for outdoor furniture. Acrylic paints are a popular choice due to their durability and ease of use. For wood projects, consider using a primer to enhance adhesion and longevity. Additionally, ensure that the paint is non-toxic if you’ll be using it for items around your garden or where food may be served.
Can I incorporate my kids into DIY projects?
Absolutely! Many DIY projects are perfect for involving children, allowing them to explore their creativity and learn new skills. Simple tasks like painting flower pots, making garden markers, or creating upcycled decor can be fun and engaging for kids. Just be sure to supervise them, especially when using tools or materials that require safety precautions. Working on projects together can also strengthen family bonds and create lasting memories.