
Introduction
As the chill of winter melts away, spring ushers in a vibrant burst of colors and life, making it the perfect season for fresh and charming nail art. Nail art has become an essential form of self-expression, allowing you to showcase your personality and creativity right at your fingertips. With the rise of DIY nail art trends, you no longer need to visit a salon to achieve stunning designs. The accessibility of at-home nail art means you can experiment with a plethora of styles and techniques, all while enjoying the satisfaction of creating something uniquely yours. In this article, we’ll explore a variety of delightful nail art ideas that you can easily replicate at home, helping you embrace the beauty of spring.
“Creating a cozy reading nook is all about maximizing comfort in a small space. It’s about intentional design that serves both function and feeling.”
– Interior Design Magazine
Why Spring is the Perfect Season for Nail Art
Spring is synonymous with renewal, and its colors echo this sentiment. The season brings forth a palette of soft pastels, vibrant florals, and lively greens, all of which provide endless inspiration for your nail art journey. As fashion trends shift to reflect the joy of warmer weather, nail art offers an additional canvas for expressing personal style. Whether you prefer delicate patterns or bold statements, your nails can serve as an extension of your wardrobe, mirroring the excitement of spring fashions.
Nail art not only allows you to play with color and design but also uplifts your mood. Just as flowers bloom and nature awakens, a fresh nail design can instill a sense of joy and optimism. The simple act of painting your nails can transform your outlook, making it a delightful ritual to welcome the season of growth and beauty. With this in mind, let’s dive into the essentials you’ll need to create stunning art at home.
Essential Tools and Materials for Nail Art at Home
Creating beautiful nail art at home requires some basic tools and materials. Here’s what you’ll need to get started:
| Tool/Material | Description | Recommended Brands |
|---|---|---|
| Nail Polish | A variety of colors for base and designs. | OPI, Essie, Sally Hansen |
| Dotting Tools | For creating dots and intricate designs. | Born Pretty, Aimeili |
| Nail Brushes | Fine-tipped brushes for detailed work. | Kiara Sky, Nail Art Boutique |
| Top & Base Coats | For nail protection and longevity of designs. | Seche Vite, Essie |
Before you begin your nail art adventure, it’s crucial to prep your nails. Start with a clean slate by removing any old polish and shaping your nails to your desired length. Apply a high-quality base coat to protect your natural nails from staining and to create a smooth surface for your polish. Once your base coat is dry, you can unleash your creativity. Consider organizing your supplies in a dedicated space to streamline your nail art process, making it easier to find what you need when inspiration strikes.
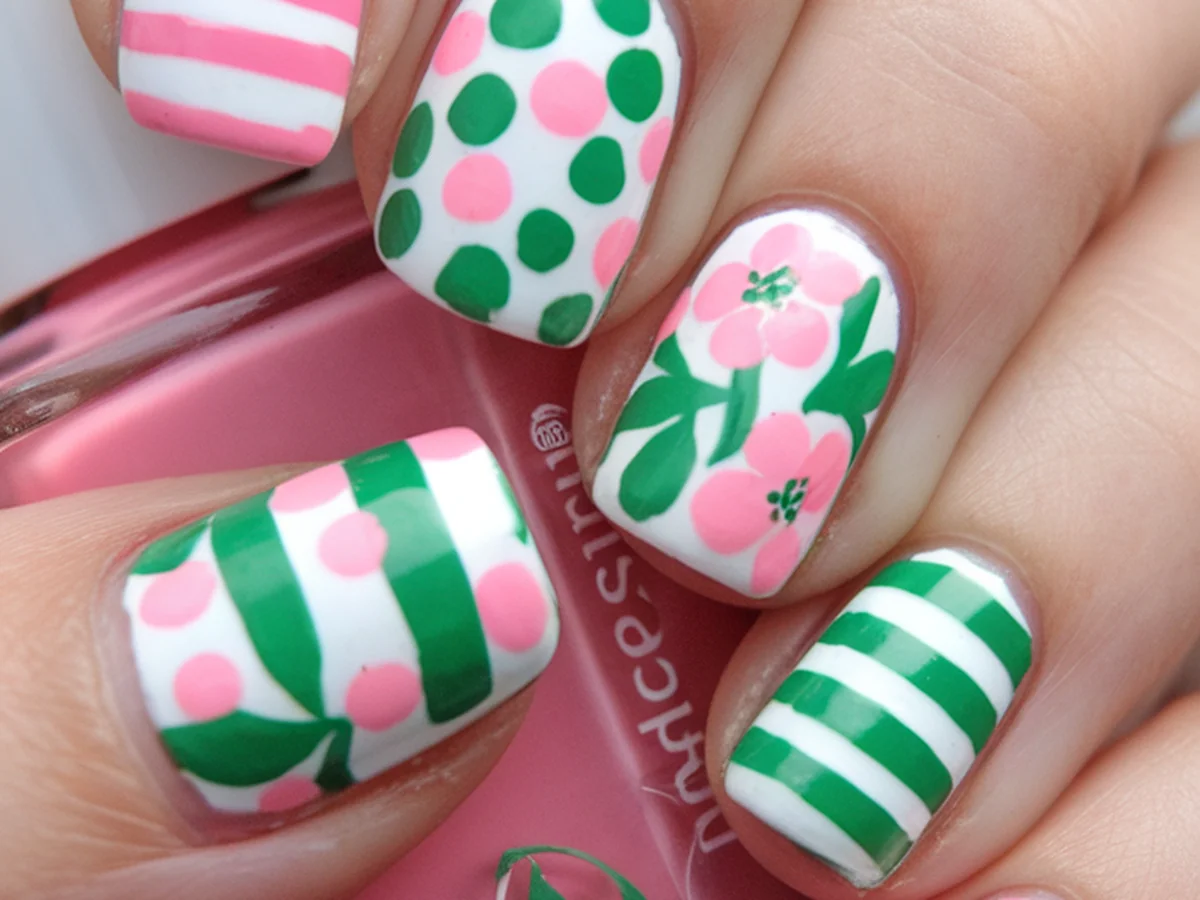
Floral Nail Designs: Embracing the Spring Bloom
One of the most iconic symbols of spring is the blooming flower, and it’s no surprise that floral nail designs are a favorite during this season. You can create stunning flower patterns with just a dotting tool and a bit of practice. Start by choosing a few complementary colors for your flowers and a neutral base. Using your dotting tool, create small dots in a circular formation to shape the petals. Add a tiny dot in the center for a beautiful flower finish.
For a softer look, consider using watercolor techniques. This approach involves using a sheer polish and a small brush to blend colors, mimicking the delicate appearance of watercolor paintings. You can also create accent nails with larger blooms to draw attention to specific fingers. If you want to take your floral designs to the next level, using nail stickers or stencils can help achieve intricate patterns without the difficulty of freehand painting.
Pastel Palette: A Soft and Subtle Approach
Pastel colors are a hallmark of spring, offering a soft and subtle aesthetic that’s perfect for nail art. To create stunning ombre effects, choose two or three pastel shades and apply them using a makeup sponge for a gradient look. This technique creates a dreamy blend that’s visually appealing and perfect for the season.
You can also use tape to create simple stripe designs. By applying tape at angles across your nails, you can paint different sections in various pastel shades, resulting in a chic and modern look. Mixing and matching pastel shades is another great way to create unique designs. Consider adding a touch of glitter or shimmer to one of the pastel colors for a playful twist that catches the light beautifully.
Geometric Patterns: Modern and Chic
If you’re looking for something modern and chic, geometric patterns are a fantastic choice for spring nail art. Using tape to create clean lines and shapes allows you to achieve professional-looking designs right at home. Start by painting your base color and allowing it to dry completely. Once dry, apply strips of tape in your desired pattern and paint over them with a contrasting color. Carefully remove the tape to reveal sharp, clean lines.
Color blocking techniques can also make a bold statement. Choose vibrant colors that complement each other and block sections of your nails with different shades. For a contemporary twist, you can incorporate negative space into your designs, leaving parts of your natural nail exposed for a sleek look. Combining geometric designs with floral elements creates a beautiful contrast that celebrates both modern and classic aesthetics.
Minimalist Nail Art: Less is More
If you prefer a more understated approach, minimalist nail art is perfect for you. This style emphasizes simplicity with clean lines and small accents. You can create simple dots and lines to form elegant designs that are both chic and sophisticated. A single dot at the base of your nail, for instance, can serve as a subtle accent.
Using negative space creatively can also enhance your minimalist designs. By leaving parts of your nails unpainted, you can create striking visual effects that are both modern and elegant. Choose a muted color palette or soft pastels for a cohesive look that speaks to the beauty of simplicity. Minimalist nail art allows you to express your style without overwhelming your nails, making it a timeless choice.
Seasonal Symbols: Incorporating Spring Themes
Spring is filled with delightful symbols, and incorporating them into your nail art can be a fun way to celebrate the season. Think of bunnies, eggs, and butterflies as playful elements to include in your designs. You can use nail stamps for detailed seasonal symbols, making it easier to achieve complex designs without the frustration of freehand painting.
Combining these symbols with a vibrant color palette can create a festive look that’s perfect for spring celebrations. Consider creating themed sets for special occasions, such as Easter or spring parties, by coordinating your nail designs with your outfits. This not only showcases your creativity but also adds an extra touch of fun to your seasonal festivities.
Quick Tips for Nail Art Success
Achieving stunning nail art takes patience and practice, so don’t be discouraged if your first attempts don’t turn out perfectly. Here are some quick tips to help you succeed:
- Take your time: Rushing through designs can lead to mistakes. Allow each layer to dry before moving on to the next.
- Fix mistakes easily: If you make a mistake, use a cotton swab dipped in nail polish remover to clean up around the edges.
- Nail care matters: Keep your nails healthy by moisturizing your cuticles and using a strengthening base coat.
- Explore your creativity: Don’t be afraid to experiment with colors, shapes, and techniques. Your nails are a canvas for self-expression.
By incorporating these tips into your routine, you’ll find yourself improving with every design you create.
Conclusion
Creating charming nail art at home is not only a rewarding experience but also a delightful way to express your personality as spring unfolds. The joy of experimenting with colors, patterns, and techniques can significantly enhance your mood and creativity. We encourage you to share your nail art creations on social media, using them as a source of inspiration for others. Don’t hesitate to experiment with the ideas presented in this article, and let your nails reflect your unique style. Remember, nail art is all about self-expression, so embrace the colors and themes of spring with open arms!
Frequently Asked Questions
What are the best colors for spring nail art?
Spring is all about light and vibrant colors. Pastels such as mint green, soft pink, lavender, and baby blue are popular choices. Additionally, brighter shades like coral, sunny yellow, and classic white can also bring a fresh look to your nails. Mixing these colors can create beautiful designs that reflect the season’s uplifting spirit.
How long does nail art usually last?
The longevity of nail art can vary depending on the types of products used and your daily activities. Generally, a well-applied manicure can last anywhere from 5 to 14 days. To extend the life of your nail art, always apply a good quality top coat and avoid activities that may chip or damage your nails, such as excessive exposure to water.
Can I create nail art without special tools?
Absolutely! While specialized tools can make the process easier, you can create beautiful nail art using everyday items. For instance, a toothpick can be used for dotting and painting fine lines, or you can use household tape for creating clean lines. Your creativity is the only limit!
Is nail art safe for my natural nails?
Yes, nail art can be safe for your natural nails if done correctly. It’s important to use high-quality products, such as non-toxic nail polish and base coats, to prevent damage. Additionally, ensure you take breaks between manicures to allow your nails to breathe and recover.
What are some common mistakes to avoid when doing nail art at home?
Common mistakes include not allowing layers to dry properly, applying too much polish, which can lead to bubbling, and skipping the base coat. It’s also essential to clean your tools regularly to maintain good hygiene. Taking your time and practicing will help you avoid these pitfalls and improve your nail art skills.