
Introduction
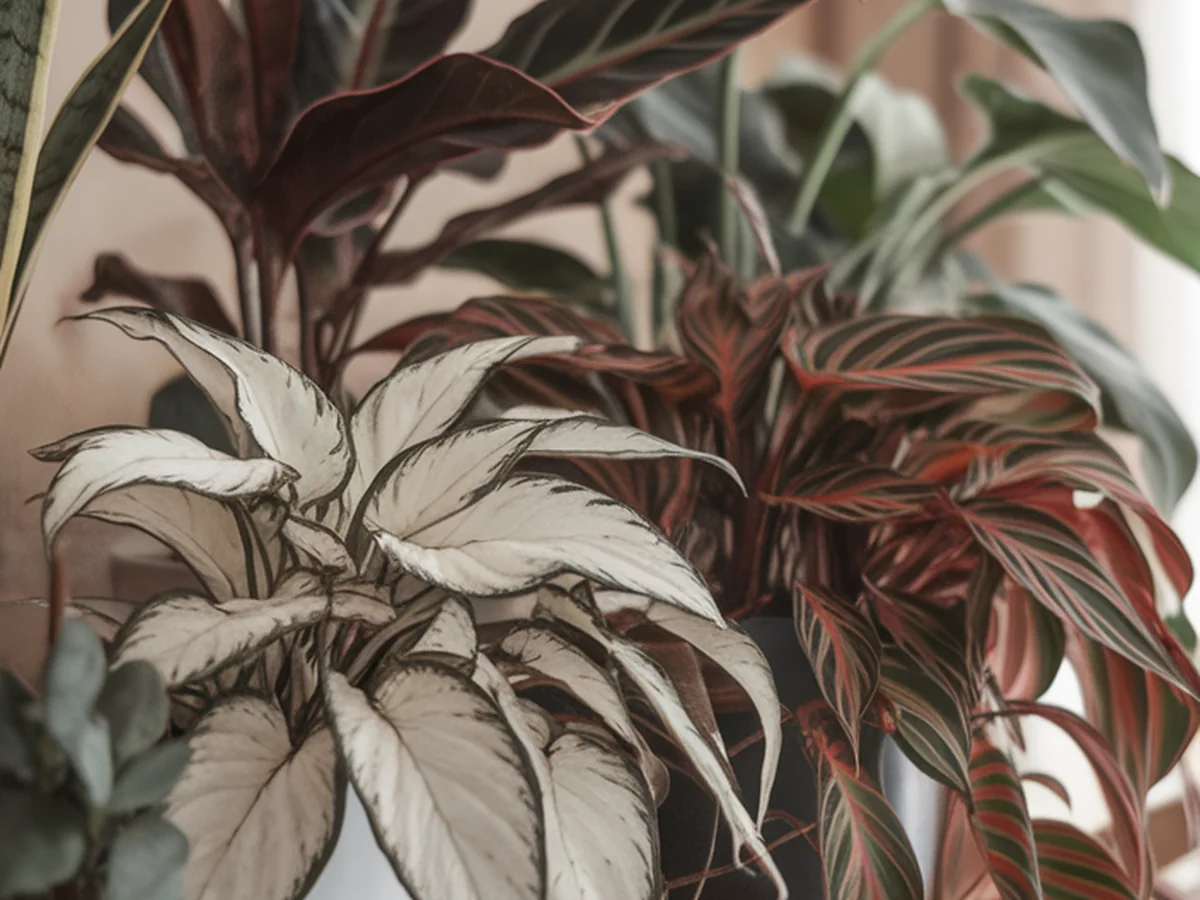
Indoor plant propagation is a rewarding and fulfilling process that allows you to expand your collection while nurturing your green thumb. As the days grow shorter and temperatures drop, fall presents a unique opportunity for plant enthusiasts to engage in propagation. This season is not only ideal for certain plants to thrive but also perfectly aligns with the natural rhythm of indoor gardening. By taking advantage of the fall months, you can create new life from existing plants, ensuring a flourishing indoor garden that will bring joy throughout the colder months.
Embracing the art of propagation offers numerous benefits. It can save you money on plant purchases, allow you to share the love of gardening with friends and family, and contribute to a more sustainable lifestyle. As you dive into this engaging endeavor, you’ll discover the joy and satisfaction that comes from nurturing new growth from cuttings, seeds, or divisions. Let’s explore the essential insights and techniques that will help you master the art of indoor plant propagation this fall.
“Creating a cozy reading nook is all about maximizing comfort in a small space. It’s about intentional design that serves both function and feeling.”
– Interior Design Magazine
Understanding Indoor Plant Propagation
Plant propagation refers to the process of creating new plants from existing ones. This can be achieved through various methods, each with its own set of techniques and requirements. The most common propagation methods include:
- Cuttings: Taking a portion of a plant, such as a leaf or stem, and encouraging it to root.
- Division: Splitting a plant into smaller sections, each with roots, allowing for the growth of multiple new plants.
- Seeds: Starting plants from seeds, which involves germination and nurturing young seedlings.
- Layering: Encouraging a stem to root while still attached to the parent plant.
Timing is crucial when it comes to propagation. Fall is an excellent time for many indoor plants, as they tend to be in a growth phase before entering dormancy. However, each plant species has its own ideal propagation window, often influenced by seasonal changes. Understanding the specific needs and seasonal behavior of your plants will significantly enhance your success rate.
Choosing the Right Plants for Propagation in Fall
When considering propagation during the fall, some indoor plants are particularly well-suited for this season. Here are a few popular choices:
| Plant Name | Propagation Method | Notes |
|---|---|---|
| Spider Plant | Cuttings | Easy to propagate; produces “pups” for cloning. |
| Pothos | Cuttings | Thrives in low light; roots in water quickly. |
| Peace Lily | Division | Best time to divide is after blooming. |
| Snake Plant | Division/Cuttings | Highly adaptable; tolerates low light. |
When selecting plants for propagation, consider their light requirements and growth patterns. For instance, plants that thrive in lower light conditions may be more suitable for fall propagation indoors, where natural light is limited. However, some plants may not be ideal for propagation during this season. Tropical species, for example, may require warmer conditions than what fall provides, making them less likely to succeed.
Essential Tools and Materials for Successful Propagation
To embark on your propagation journey, having the right tools and materials is essential. Here’s a list of what you’ll need:
- Pruning Shears: For taking cuttings cleanly and effectively.
- Pots: Small containers for your new plants.
- Soil: A well-draining potting mix suitable for the specific plants you’re propagating.
- Humidity Domes: To maintain moisture and humidity around your cuttings.
Using sterile materials is crucial in preventing diseases that can harm your new plants. Always sterilize your tools before use, and consider using fresh potting soil rather than reusing soil from existing plants. Quality materials can often be found at local garden centers or reputable online retailers. Investing in good supplies will significantly increase your chances of successful propagation.
Step-by-Step Guide to Common Propagation Techniques
Understanding how to effectively propagate plants involves mastering different techniques. Here’s a detailed guide to some of the most common methods:
Cuttings
Taking cuttings is one of the simplest propagation methods. To do this, follow these steps:
1. Select a healthy parent plant and identify a stem or leaf that is robust.
2. Use clean, sharp pruning shears to cut a section of the stem, ideally with a few leaves attached.
3. Remove the lower leaves, ensuring that the cutting has at least one node (the bump where leaves emerge).
4. Place the cutting in water or directly into moist potting soil.
5. Cover with a humidity dome or plastic bag to retain moisture while the cutting establishes roots.
Division
Dividing root-bound plants is another effective technique, especially for plants that grow in clumps. Here’s how to do it:
1. Carefully remove the plant from its pot and gently separate the roots.
2. Use your hands or a clean knife to divide the plant into sections, ensuring each section has roots and foliage.
3. Re-pot the divisions in fresh soil, making sure they are well-watered.
Seed Propagation
Starting plants from seeds can be rewarding but requires patience. Follow these steps:
1. Select quality seeds and a suitable potting mix.
2. Fill pots with soil and moisten it lightly.
3. Plant seeds according to package instructions, usually at a shallow depth.
4. Cover the pots with plastic to maintain humidity, and place them in a warm, bright location.
Layering
Layering involves encouraging a part of the plant to root while still attached. Here’s how to do air layering:
1. Identify a healthy branch on the parent plant.
2. Make a small cut or scrape on the stem and wrap it with moist sphagnum moss.
3. Cover the moss with plastic wrap to hold moisture.
4. Once roots develop, cut the stem below the new roots and pot it separately.
Creating the Ideal Environment for Propagation
For successful propagation, creating an optimal environment is key. Factors such as light, humidity, and temperature play a crucial role in the growth of your new plants.
Lighting: Most cuttings benefit from bright, indirect light. If natural light is limited, consider using grow lights to provide the necessary illumination for healthy growth.
Humidity: High humidity levels help cuttings establish roots more quickly. You can increase humidity by using humidity trays filled with water or by placing a plastic dome over the cuttings.
Temperature: Maintain a consistent temperature between 65°F to 75°F (18°C to 24°C) for best results during propagation. Avoid placing your cuttings near drafts or heating vents.
Setting up a designated propagation station can streamline the process. Use a table near a light source and organize your tools and materials for easy access. Having everything in one place can save time and reduce stress as you care for your new plants.
Common Challenges and How to Overcome Them
While propagation can be a rewarding endeavor, it does come with its challenges. Here are some common issues and how to address them:
Root Rot: This occurs when cuttings sit in overly wet soil. To prevent root rot, ensure that your pots have drainage holes and use a well-draining potting mix. Water only when the top inch of soil feels dry.
Mold: Mold can develop in high humidity environments. To prevent this, ensure good air circulation around your cuttings and consider using a fungicide if mold appears.
Pest Infestations: Keep an eye out for pests like aphids or spider mites on your cuttings. Regularly inspect your plants and treat them with insecticidal soap or neem oil if necessary.
Knowing when a propagated plant is ready for transplanting is crucial. Look for signs such as healthy root development, new leaf growth, and a sturdy structure. When you see these signs, it’s time to move your new plant to a permanent pot.
Nurturing Your New Plants to Maturity
Once your new plants have been propagated, the next step is nurturing them to maturity. Here are some care instructions to guide you:
Watering Needs: Young plants require consistent moisture but avoid overwatering. Check the soil regularly and water when the top inch feels dry.
Fertilization: Use a diluted, balanced fertilizer every 4-6 weeks to promote healthy growth. Be cautious not to over-fertilize, as this can harm young plants.
Acclimating: Gradually acclimate your new plants to their permanent locations. Start by placing them in a sheltered spot before moving them to their final destination, allowing them to adjust to the new environment without shock.
By following these care instructions, you can ensure that your propagated plants thrive and become beautiful additions to your indoor space.
Sharing the Joy of Propagation: Community and Sustainability
One of the most fulfilling aspects of plant propagation is the ability to share your success with others. Sharing propagated plants with friends and family fosters a sense of community and strengthens bonds through a shared love of gardening. Consider hosting a plant swap in your neighborhood or participating in local community gardening events to exchange plant cuttings, seeds, and knowledge.
Moreover, propagation plays a significant role in sustainability. By creating new plants from existing ones, you contribute to reducing the demand for commercially grown plants, which often involve significant resources and environmental impact. Embracing propagation not only enhances your indoor garden but also aligns your gardening practices with a more sustainable and eco-friendly approach.
Conclusion
Mastering the art of indoor plant propagation can be a deeply gratifying experience, providing both emotional and practical rewards. As you cultivate new plants this fall, remember the joy that comes from nurturing life and creating a thriving indoor garden. Embrace the process, share your experiences with fellow plant enthusiasts, and take pride in your ability to propagate and care for plants.
As you embark on this fulfilling journey, consider exploring further resources to expand your knowledge and connect with a community of like-minded individuals. Happy propagating!
Frequently Asked Questions
What is the best time of year to propagate indoor plants?
The best time to propagate indoor plants varies by species, but fall is generally a great time due to the cooler temperatures and reduced light levels. Many plants enter a growth phase during fall, making it easier for cuttings to root and establish themselves.
How long does it take for cuttings to root?
The time it takes for cuttings to root can vary significantly depending on the plant species and environmental conditions. Generally, you can expect roots to develop within 2 to 6 weeks. However, some plants may take longer, so patience is key.
Can I propagate plants in water instead of soil?
Yes, many plants can successfully root in water before being transferred to soil. This method is particularly effective for species like Pothos and Spider Plants. Just ensure you change the water regularly to prevent stagnation and promote healthy root development.
What should I do if my propagated plants are not growing?
If your propagated plants are not showing growth, check their environmental conditions, including light levels, humidity, and watering practices. Ensure they are not too wet or too dry, and adjust their light exposure as needed. Sometimes, simply giving them more time can yield results.
Is it safe to propagate plants that have been treated with pesticides?
It’s generally advisable to avoid propagating plants that have recently been treated with pesticides, as the chemicals can affect the health of the new cuttings. If you must propagate such plants, wait a few weeks after treatment to ensure that any residual chemicals have dissipated.