
Introduction
Imagine stepping out of your home and onto a beautifully crafted set of stairs that leads you down into your serene outdoor oasis. The warm sun filters through the leaves, casting playful shadows on the wooden steps, while the gentle sounds of nature surround you. This picturesque scene not only enhances the beauty of your yard but also adds a touch of sophistication and accessibility to your outdoor space.
Outdoor spaces have become increasingly important in enhancing both the enjoyment of your home and its overall value. Beautifully designed stairs can serve as a practical solution for navigating different levels of your garden or patio while simultaneously elevating the aesthetic appeal of your landscape. In this article, we promise to provide you with practical guidance and inspiration to create stunning DIY stairs that will transform your outdoor oasis into a breathtaking retreat.
“Creating a cozy reading nook is all about maximizing comfort in a small space. It’s about intentional design that serves both function and feeling.”
– Interior Design Magazine
Understanding the Purpose of Outdoor Stairs
When considering outdoor stairs, it’s essential to think about their functional benefits first. Stairs provide accessibility to different areas of your yard, ensuring that everyone can enjoy your outdoor space safely. They also contribute to safety by providing secure footing and clear navigation, especially in hilly or uneven terrains.
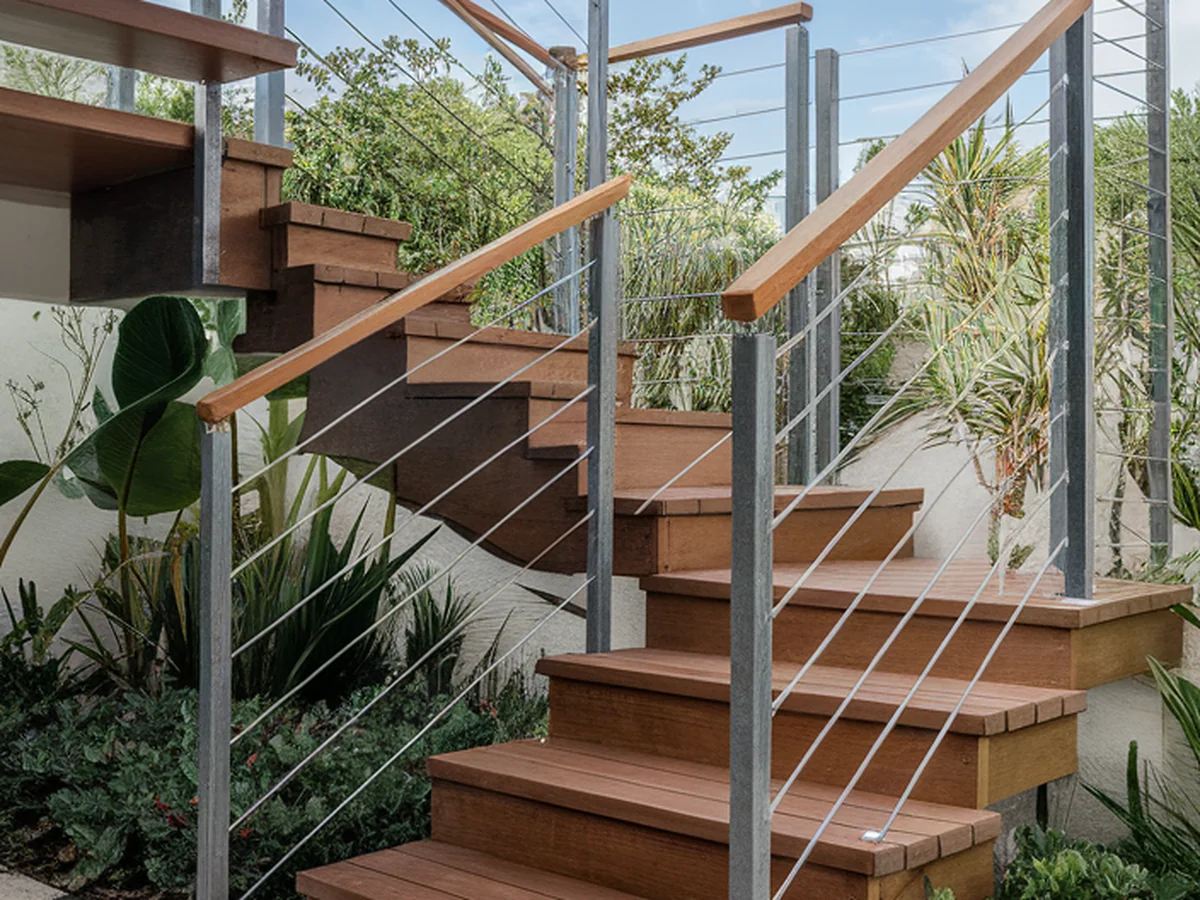
Beyond functionality, stairs can significantly enhance your garden’s aesthetic appeal. Well-designed stairs can complement your landscaping and add visual interest, making them a focal point in your outdoor design. Whether you are creating garden steps that meander through flower beds or a grand staircase leading to a patio, the design choices you make can transform a simple pathway into a captivating feature.
Outdoor stairs come in various types, each serving specific purposes. For instance, garden steps can lead visitors through lush greenery, while patio access stairs provide a seamless transition from your home to outdoor living spaces. Understanding these purposes will help you make informed decisions about your DIY project.
Choosing the Right Materials for Your DIY Stairs
Selecting the right materials for your DIY stairs is crucial, as they will impact both durability and aesthetics. The most common materials include:
| Material | Pros | Cons |
|---|---|---|
| Wood | Natural beauty, easy to work with | Requires regular maintenance, may rot |
| Stone | Durable, weather-resistant | Expensive, difficult to install |
| Concrete | Sturdy, low maintenance | Can be unattractive, heavy |
| Composite | Low maintenance, eco-friendly | Can be costly, limited design options |
Each material has its own pros and cons, so it’s essential to consider factors like durability, maintenance, and aesthetics when making your choice. For those environmentally conscious, sustainable materials such as reclaimed wood or bamboo composites are excellent options that contribute to eco-friendly building practices.
Budgeting for materials is also important. Look for local suppliers or consider purchasing materials during sales to find the best deals without compromising on quality. Many home improvement stores even offer discounts for bulk purchases, which can significantly reduce costs.
Designing Your Stairs: Styles and Inspirations
When it comes to designing your stairs, various styles can suit your outdoor aesthetic. Popular designs include:
- Straight Stairs: Simple and straightforward, ideal for small spaces.
- Curved Stairs: Add elegance and are perfect for gardens with soft landscaping.
- Spiral Stairs: Space-saving and unique, suitable for compact areas.
Integrating your stairs with the existing landscape is vital for creating a harmonious outdoor environment. Observe how the stairs can complement the natural elements around them. For instance, if your garden features winding paths or a water feature, a complementary stair design can enhance the overall aesthetic.
Using design software or sketching your ideas can help you visualize your stair layout effectively. This planning stage is essential for ensuring that the stairs blend seamlessly into your outdoor environment. Don’t shy away from incorporating your personal style—consider adding unique features such as decorative railings, ambient lighting, or even planter boxes along the sides of your stairs to create a personalized touch.
Essential Tools and Equipment for Construction
Before you start building, make sure you have the necessary tools and equipment to make the process smoother and safer. Essential tools include:
- Saws: For cutting your materials to size.
- Drills: To secure screws and anchors.
- Levels: To ensure your stairs are even and straight.
Safety gear is equally important. Always wear personal protective equipment (PPE) like gloves, goggles, and masks to prevent injuries while working.
If you’re on a budget, consider borrowing or renting tools from local hardware stores or community tool libraries. This can save you money while still allowing you to have access to high-quality equipment. Optional tools like a laser level can also enhance the building process by providing precise measurements.
Step-by-Step Guide to Building Your DIY Stairs
Building your DIY stairs can be a rewarding experience. Here’s a step-by-step guide to help you through the process:
1. Preparation: Start by measuring and marking the area where you intend to install the stairs. Ensure that you account for the height and width of each step.
2. Building the Frame: Create a sturdy frame by digging footings and securing the support beams. It’s crucial to ensure that the base is solid and level to prevent any future issues.
3. Assembling the Treads and Risers: Once your frame is in place, attach the treads (the horizontal parts you step on) and risers (the vertical parts). Use screws to secure them adequately.
4. Finishing Touches: Finally, sand the surfaces to eliminate any rough edges and apply a stain or sealant to protect your stairs from the elements and enhance their appearance.
Building your own stairs may take time and effort, but the satisfaction of creating something beautiful and functional will make it worth it.
Maintenance Tips for Your Outdoor Stairs
To ensure the longevity of your outdoor stairs, regular maintenance is essential. Here are some tips:
– Regular Inspections: Check your stairs for any signs of wear and tear, such as loose treads or unstable railings. Addressing these issues early can prevent more significant problems down the road.
– Cleaning Methods: Different materials require different cleaning techniques. For wood, gentle scrubbing with soap and water is often sufficient, while stone may need a pressure wash to remove dirt and grime.
– Seasonal Care: Prepare your stairs for winter by clearing away snow and ice to prevent damage. During heavy rains, ensure proper drainage to avoid water pooling around the base.
– Repairing Minor Damages: Learn how to fix common issues such as squeaky steps or cracked surfaces. Many repairs are simple and can be done with minimal tools.
Incorporating Landscaping Around Your Stairs
Landscaping around your newly built stairs can enhance their beauty and usability. Here are a few ideas to consider:
– Planting Around Stairs: Use flowers, shrubs, or ground cover plants to soften the edges of your stairs and integrate them into the garden. Choose plants that thrive in your local climate for the best results.
– Using Lighting: Incorporate lighting features to highlight your stairs and create a welcoming ambiance during the evening. Solar lights or string lights can add charm and safety.
– Pathways and Borders: Create pathways leading to your stairs using gravel, mulch, or pavers to guide visitors and enhance accessibility. Borders can delineate the stair area and add structure to your landscape.
– Enhancing Usability: Consider adding seating areas or decorative elements nearby, such as benches or sculptures, to encourage relaxation and enjoyment of your outdoor oasis.
Real-Life Examples and Inspirational Stories
To inspire your DIY journey, let’s take a look at some successful stair projects that have transformed outdoor spaces:
1. A Rustic Wooden Staircase: One homeowner built a stunning wooden staircase that meanders through their flower garden, using reclaimed wood for an eco-friendly touch. The stairs became a central feature, inviting guests to explore the garden.
2. Elegant Stone Steps: A couple created a set of elegant stone steps leading down to their patio, using natural stones that blend perfectly with their landscape. The addition of solar lights along the edges provided a magical glow at night.
3. Spiral Staircase: A small urban balcony was transformed with a spiral staircase, saving space while providing access to a rooftop garden. The homeowner added colorful planters along the staircase, creating an eye-catching focal point.
Through interviews with DIY enthusiasts, many shared that their projects taught them valuable lessons about planning and creativity. As one homeowner noted, “Building my stairs was not just about functionality; it was about creating a piece of art in my garden.”
Conclusion
Incorporating beautifully crafted DIY stairs into your outdoor space has the power to transform not only the landscape but also your overall enjoyment of your home. With careful planning, the right materials, and a dash of creativity, you can create a stunning feature that enhances both the beauty and functionality of your oasis.
We encourage you to take the first step in your DIY stair project today! Share your experiences and any personal projects in the comments section. There’s immense joy and satisfaction in creating something beautiful and functional, and we can’t wait to hear about your journey.
Frequently Asked Questions
What materials are best for DIY outdoor stairs?
Choosing the best materials for your DIY stairs depends on your specific needs and the aesthetic you want to achieve. Common choices include wood for its natural beauty, stone for durability, concrete for low maintenance, and composite for eco-friendliness. Each material has its own advantages and disadvantages, so consider factors like weather resistance, maintenance requirements, and overall appearance when making your choice.
How do I ensure my outdoor stairs are safe?
To ensure safety, make sure your stairs have a solid foundation and are securely attached. Use non-slip materials for treads, and consider adding railings for extra support, especially if your stairs are steep. Regularly inspect your stairs for wear and tear, and address any issues immediately to prevent accidents.
Can I build stairs on a slope?
Yes, you can build stairs on a slope, and this can enhance accessibility and navigation in hilly areas. When building on a slope, be mindful of the height and depth of each step to ensure comfort and safety. Using landings can also help break up long stretches of stairs, making them easier to navigate.
How much does it typically cost to build DIY stairs?
The cost of building DIY stairs varies based on materials, size, and design. On average, you might spend anywhere from $300 to $1,500 or more, depending on the materials you choose and whether you need to hire any help for the installation. Planning your budget in advance can help you avoid unexpected expenses.
What maintenance do outdoor stairs require?
Outdoor stairs require regular maintenance to ensure their longevity. This includes checking for loose treads or railings, cleaning them to remove dirt and debris, and addressing any weather-related damage. Depending on the material, you may need to apply sealant or stain periodically to protect against the elements.